


Originally featured in our MADE OZ coverage, Zeke’s stunning resto-mod Gemini World randonneur build was expanded upon by Alex Streich on the Off Course Bike Shop blog. We’ve got the whole write-up below for a very in-depth Readers’ Rides!
For everyone reading who isn’t deep in Australian cycling culture, Gemini World Randonneurs are the quintessential Great Australian Touring Bike; which means, much like the four wheeled Holden (Opel) Commodore and Ford Falcon, their DNA isn’t particularly unique OR Australian but, they’re what we had at the time and they were pretty nice, so we got pretty fond of them and we’re disproportionately proud of them, I guess it’s just part of the national psyche.
It’s a Nice Old Touring Bike, like a Dawes Galaxy, Trek 520/620/720 or Univega Specialissima; built with cantilever brake mounts, rack mounts, clearance for ~622x38mm tires with fenders, and good quality but stout-ish tubing. Anyway, I bought the WR off my friend Trent in about 2014. It’s from approximately 1990/91; and although I could possibly pester Vivente (Gemini in it’s current form) with the serial number, we’re just getting into semantics here.
At that point it was still using the original Shimano Uniglide rear hub and its drivetrain was pretty thrashed. Sprockets were missing teeth and there was a seriously worn middle chainring. I gave it a thorough refresh, spent $100 to buy a NOS Shimano 44t half-step chainring from Germany (a princely sum for a 7-8 speed chainring, but necessary to ensure compatibility). I built new wheels (with a Hyperglide freehub, fancy!) and added some decent racks and fenders. I’ve generally had a blast riding it on and off amongst my too-large stable of bikes for the last decade.


The Build
Velo-Orange very kindly offered to send us a bike’s worth of parts if I could do a good job of producing a show worthy bike showcasing their product to put on the VO Stand at the MADE Australia Bike Show.
In some ways spec’ing parts for the build was fairly easy; I wasn’t scouring the entire cycling industry, just the VO catalogue, and only went outside for components they didn’t carry (massive thanks to Schmidt SON for the dynamo and lights, and Rene Herse for the tires).


It’s also worth noting that VO carries a good selection of Dia Compe bits which I happily picked out as well.
The bike was stripped of its old parts, cleaned, inspected for cracks and checked for alignment. I also gave the beautifully chaotic paint job a light polish. It’s got plenty of chips in the paint but it hides them in a sort of “dazzle camouflage” kind of way.

The one area that paint couldn’t hide its damage was the drive-side chainstay. Given that it was now a show bike, I spent about $40 on a metre of 25mm wide, 0.6mm thick brass sheet and a small ball-peen hammer. I then spent 10 hours teaching myself some rudimentary sheet metal shaping on the way to making the polished brass chainstay protector.


Frame Modification
Dynamo lights are fantastic, and doubly so if you have ADHD like me and always lose or forget to charge USB lights. The trick with this bike was that I wanted to hide the wiring as much as possible.
Porting a frame for any sort of internal routing is always a big decision and on a new frame it will void your warranty; however, in this case I did some thinking and have come to a perspective that is my own.

There are three reasons I ultimately went ahead with the internal routing, one and two are that this frame is both Lugged and made of thicker gauge tubing. It has the externally reinforcing sleeves at all the main tube joints which brace the frame at the points where it sees the most stress, and while the true racing bikes of this era used 27.2mm seatposts, this bike has a seat tube that is 26.4mm internally; so the wall thickness of the seat tube is verifiably thicker, and it would be implausible to assume that the seat tube is the only tube like this.
The third reason is that I determined I would specifically pick low-stress or reinforced sites to poke holes; the frame hasn’t been x-rayed or subjected to computerised finite-element-analysis but a bit of reading on how stresses are diffused within bicycle frames and ~15yrs of bike mechanic experience has hopefully helped me make informed inferences about where those sites should be. Time will tell, I guess.
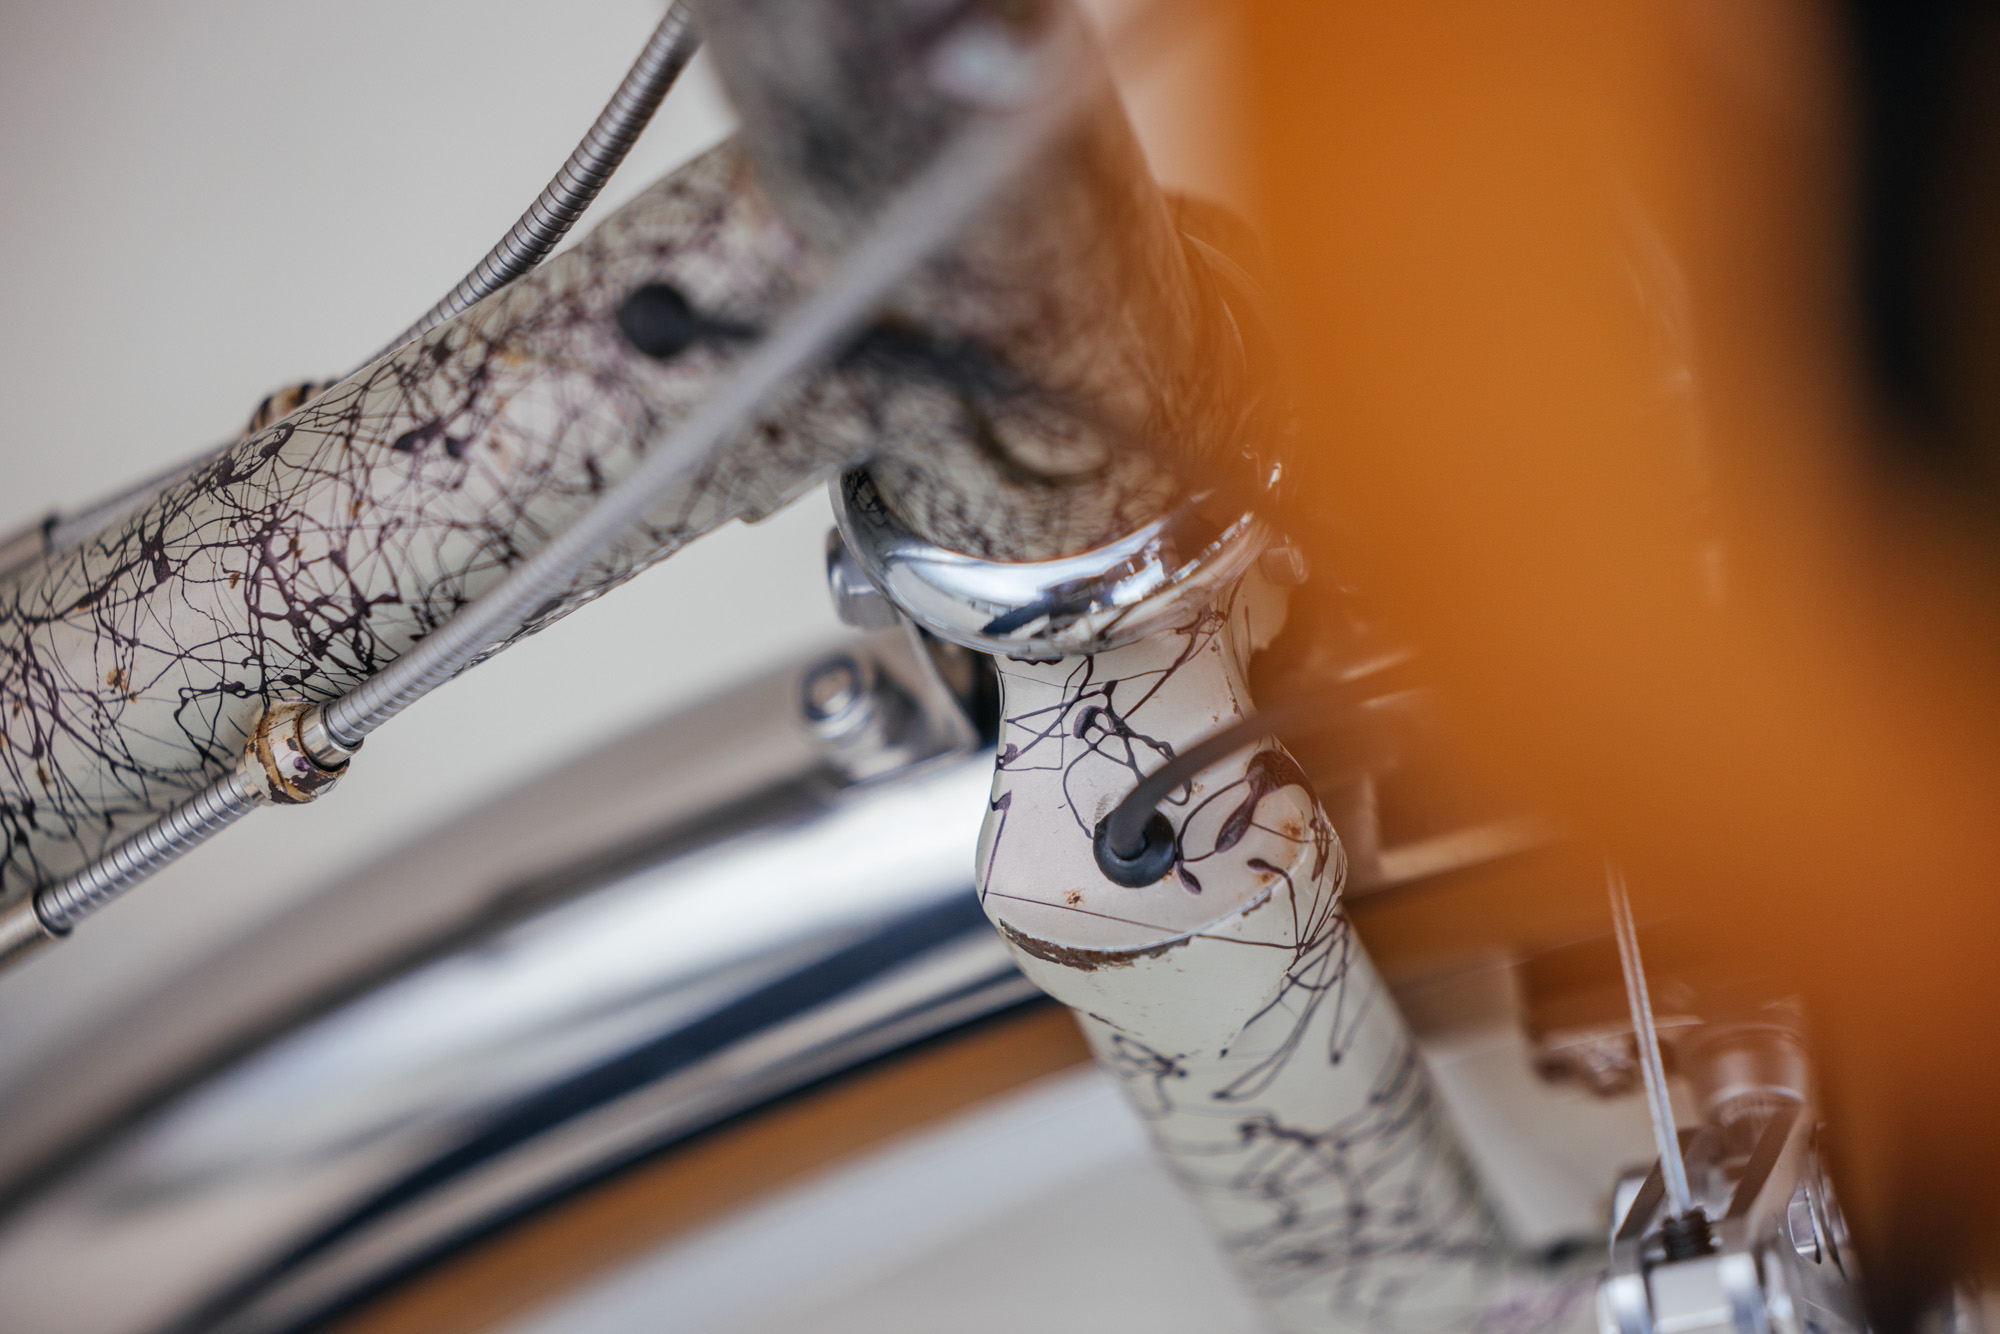
On the frame, I drilled the upper hole through the back slope of the lower head tube lug; that location has more material and unlike the flanks or underside, and it’s not really subjected to shear stress.
The lower hole I drilled in the upper-backside of the bottom bracket shell, sort of inside the triangle created by the BB shell, the chainstays and the chainstay bridge.

I also inspected inside the BB shell and found that only material I had to remove was the tail-ends of the down tube and seat tube where the factory had left them slightly long to speed frame construction. You could euphemistically refer to my work here as weight reduction.
On this fork, the flattened-off shoulder of the fork crown is a large flat area that is mostly bypassed by stress loads so drilling a hole there is very unlikely to cause issues, and at the bottom of the fork I enlarged an existing breather port, close to the dropout where the reinforcing effect of being clamped to the other fork tip through the hub is greatest.
In summation, thicker tube walls plus external reinforcement plus having a think has left me pretty confident that I haven’t sealed the Gemini’s fate. Wish me luck!


Cockpit
A lot of thought went into cockpit configuration; the frame doesn’t have downtube shifter mounts, it has a pair of cable guides either side. It’s from the era of bar-end shifters (bar-cons), and I was quite happy to leave it there by fitting the Dia Compe ENE Bar End friction shifters. Fun fact, they use the same internal ratchet mechanism as the Suntour Power Ratchet and Simplex Retrofriction shifters that were the pinnacle of shift control in the early 70’s.
Additionally, while VO does stock some aero-style brake levers from Tektro, I wanted something nicer and with more visual impact. Non-Aero levers get a bad rap, most people know them from the cheaply made ones that turned up on the low quality bike boom era bikes of the late 70’s; with the “suicide” lever that allows braking from the flat centre-section of the drop, at the cost of further hindering the brake function from the already under-spec’d calipers and main-levers. They worked terribly.

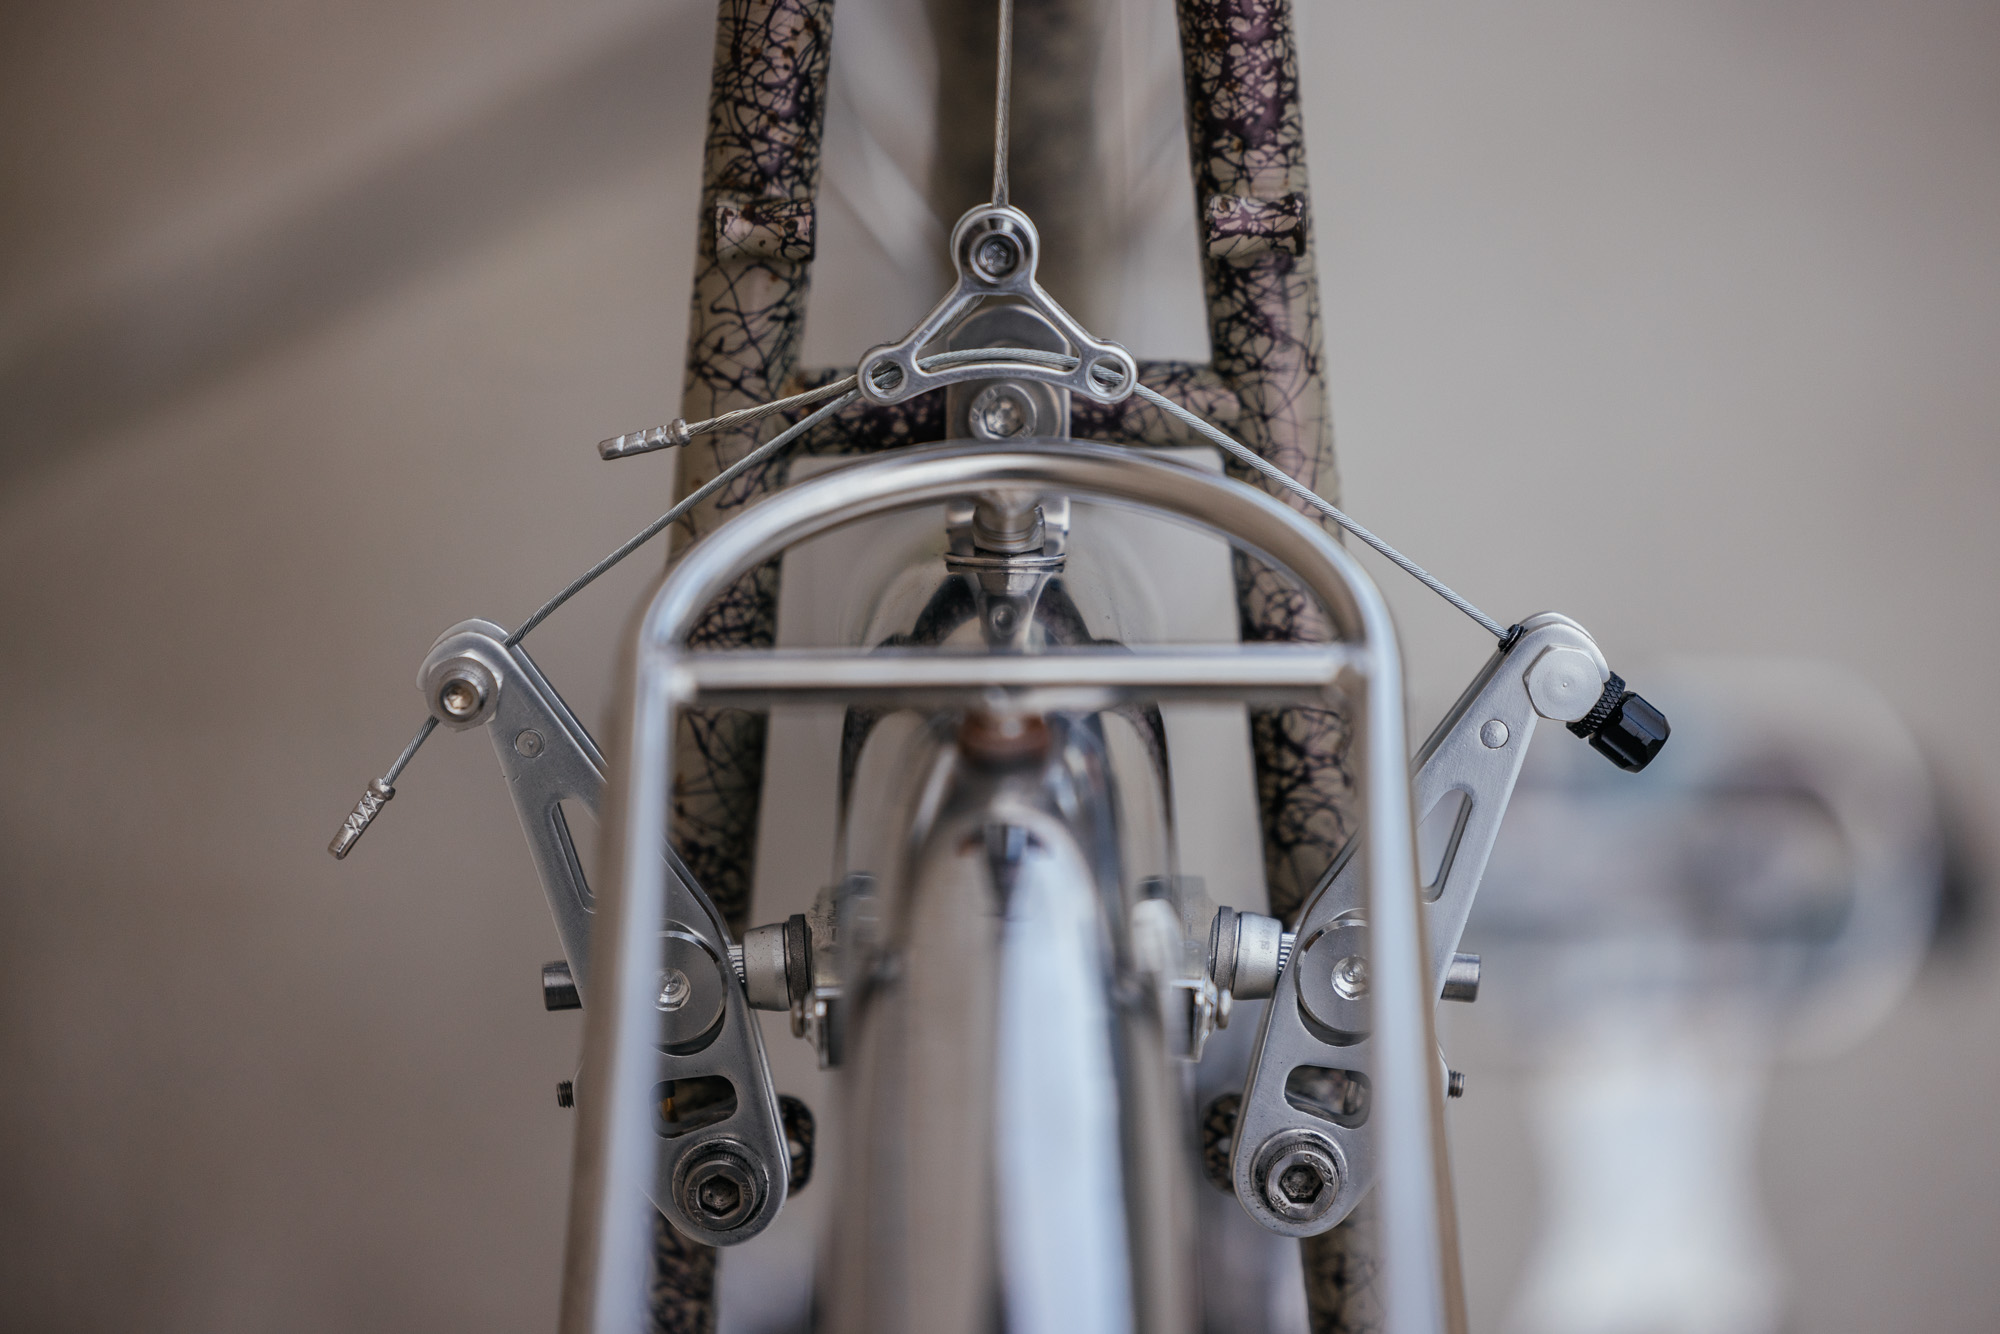
The Dia-Compe Gran Compe 202 Non-Aero lever, despite being from the same era, is the sort of brake lever that all the cheap ones were attempting and failing to copy. It’s stiff, has minimal play, classic looks and includes the super helpful barrel adjuster “olive” where the cable exits the hood. It’s also an ideal pairing with cantilever brakes, as the cable pull-rate is a little shorter again than conventional “short pull” levers allowing cantilevers to be setup in configurations that give extra clearance for fenders and the like, without requiring riders to give themselves tendonitis to stop in a reasonable distance. As they are on the WR, and paired with VO’s excellent Grand Cru Cantilever brakes, I can skid the rear tire or “endo” the bike without difficulty.

All the above controls are mounted on the 46cm VO Nouveau Randonneur handlebar; which despite its name is a thoroughly modern gravel bar; it’s got a slightly swept flattened-off top section to help relieve palm pressure, a 12 degree flare, and a modern compact ergo bend. The only complication for me is that the generous “return” on the drop, plus the additional length of the bar-cons, would result in me jabbing myself in the thigh with the bar-cons during low-speed manoeuvring. Simple solution though; using a pipe-cutter I shortened the bars by 30mm each side and then carefully filed the ends to ensure the bar-cons fit neatly.
The VO Quill stem is great because it allows you to convert a threaded 1” frame and fork to the modern 31.8 bar clamp diameter, and also allows you swap out handlebars without having to remove brake, shifter and bar-tape from one side like a traditional quill stem. I’m a big fan of Cr-Mo and the chrome plating goes great with all the other shiny bits.
When the build was almost complete I remembered that I’d seen a couple of ‘50’s French “Constructeur” bikes with what I’d sort of call a “cable garage” on the custom fillet brazed stems- it was there to support the brake cables as they looped over the top of the bars and prevent them from bouncing off the bars and stem. I realised I could probably fabricate something similar from small parts and mount it off the lower clamp bolt if I swapped it to a longer one. This one still in prototype phase, and will need some finessing to prevent it pulling on the rear cable and then soldering for longevity.

Levers were all connected to brakes and derailers with VO’s Retro Style Stainless Steel Wound Cable kits which are great; with the one caveat that, like all wound cables, modern 10/11/12 speed indexed shifting systems will have a bad time due to the small amount of squish that’s inherent in the housing design.
Otherwise, here’s all the features that rule:
- Looks great (obvs)
- The kits are very generous with housing length; I could have almost cabled a small second bike with leftovers.
- The teflon sleeve is separate from the outer, meaning that the stainless housing can be used indefinitely, only the sleeve and inner cable need to be replaced due to wear.
- You can grind the housing end flat on a bench grinder without worrying about melting the sleeve inside.
- You can use the spare sleeve offcuts for things like replacing the sleeve in a v-brake noodle.
I made the decision that the bars would be cloth wrapped, twine finished and shellacked for weather proofing and longevity; and was aware that while the non-aero levers meant that brake cable servicing would be easy enough, I had a decision to make about whether I’d A)have the shift cables run external to the tape and be unsupported and more prone to flopping about; or B) have them wrapped under the tape, supporting them but making removal for cleaning and servicing much harder without trashing the handlebar tape.

As usual, I chose the Option 3); modifying some small alu tubestock into an extended cable port and taping it in alignment with the bar-cons, then wrapping the bartape over the top. The housing is well supported without being glued in place by the shellacked tape; once I remove the shifters from the bars, the housing can be completely removed and reinstalled without disturbing the tape.
Because the stainless housing is slimmer without the plastic coating that conventional housings have, it fit loosely in the top tube and down tube cable guides.

The solution on the downtube was to modify two spare ferrules by drilling out their closed end and filing it clean, then super glueing it in place on the housing so it sits right inside the cable guides.
The toptube guides were a similar solution, but inverted; I drilled out 3 spare brass ferrules, heated them with a propane torch, slid them in place inside the cable guides and then before they cooled, melted a single dot of solder onto each, right where the guide have a slot. The housing is held semi-snug but can still slide through them, and if need be they can be removed with a soldering iron.


Drivetrain
The M550 Deore rear derailleur got cleaned, a quick polish to get rid of some scratches and I replaced the pulleys with some newer RD-6700 ones, they’re 1 tooth larger but they don’t cause any fouling issues, they mesh better with the 10 speed chain and the old ones were worn out anyway. I did have to add some washers to replicate the original pulley bushing width.
Thanks to friction shifting the original front derailleur worked pretty well on the Velo Orange 50.4 BCD cranks, but a rifle through my parts tin found the FD-A550 which has a slightly better cage shape for the 46-30 rings, as well as being all silver and having a smaller form factor. The 11-34t rear cassette gives a good range and a great first gear for long climbs.

Wheels
The wheels are 32 hole VO Voyager rims laced to a 130mm spaced VO cassette hub, and a Schmidt SON 28 dynamo hub, with DT Swiss Competition spokes.The rims are wide, not too heavy, tubeless compatible and polished finish is pretty consistent between all the wheel components; which rules!

Racks and Accutremont
- Fenders – Velo Orange Stainless Steel 700c, 45mm Wide
- Front Rack – VO Randonneur Front Rack with Integrated Decaleur, Cantilever mount
- Rear Rack – VO Constructeur Rear Rack
- Front Light – SON Edelux Polished Silver
- Rear Light – SON Rear Fender Mount Tail-light
- Handlebar Bag – VO Randonneur Handlebar Bag
On a bike like this, these parts are often integrated as much as possible; the racks and fenders help reinforce each other, the lights mount on the racks and the fenders, light wiring is partially hidden inside fenders, and the front rack is specifically designed to support the handlebar bag.
The regular VO Aluminium fenders are great, but I can say from experience that stainless steel is way. Way more scratch resistant and significantly more dent proof, and its not susceptible to metal fatigue in the same way aluminium is. Ideally fenders shouldn’t flex or bounce around, but some movement is inevitable. I also was able to carefully pry open the rolled edge of the rear fender on the LHS to tuck the rear dynamo wire inside and then even more carefully press it closed again, securing the wiring and protecting it from tire rub.
The fenders were initially installed according to the instructions, and then once I was pretty happy with the fit, I started experimenting with the racks and lights; fender and rack integration is rewarding and produces a great end result, but it’s not for the impatient; they probably came on and off at least 5 times during the process.
I ended up punching five extra holes in the rear fender; one for the tail light fastener, one for the tail light wire, two for anchoring it to the rack and one to use the L-bracket rather than crimp-on bracket for connecting it to the seat-stay bridge.
The front rack just had one extra hole punched to anchor it to the front of the Randonneur rack.


Here at the shop, we have a Hozan Fender Punch (unfortunately no longer in production), a tool kind of like a heavy-duty leather punch, which is super helpful; but I also improvised a tool using a mid-sized rat tail file (a round tapered file) which I separated from its handle, and fit into an electric drill (important note – you have to run the drill backwards/counterclockwise, otherwise the teeth will dig in and bind up!)
This improvised tool allowed me to slowly enlarge and slightly shift the punch holes, giving me some fudge-factor when punching the holes and bolting the fenders to the rack.
The main difference between my experiments with this approach and experiments with a dremel is that the slow taper and long length of the file allows you to gauge the expanding diameter of a hole more precisely.
It also got used when I ported the frame for the internal wiring, allowing me to drill a small hole perpendicular to the tube wall, and then use the tool to slowly enlarge and re-angle the hole so the wire could flow more smoothly.
If I was doing the fender fit at home, or without the Hozan tool, I would drill a small pilot hole and then spend more time enlarging with the “motor-file”.

With the fenders and racks fitted, the tail light mounted to the fender, the headlight mounted off the front rack, and the internal wiring snaking through the assembly, the VO Randonneur Handlebar Bag finishes the bike off.
Like all the VO luggage, the RHB is made by Road Runner Bags in LA and is very well made, as well as specifically designed to mount to the VO decaleur; although it also has webbing and straps for additional stability, or to adapt it to other mounting solutions.
It’s also the first bag I’ve had with a brightly coloured liner and I’ve been kicking myself for not clocking the value of this sooner; I don’t need a bag with a dark coloured liner to routinely lose keys and headphones inside, actually being able to see the objects inside is a game changer.

Thanks for taking the time to read this deep dive into my World Randonneur, I hope you enjoy the build and process!
I’d also like to extend a thanks to Velo Orange for helping facilitate this build and make it a reality, Schmidt SON for the dynamo kit and Rene Herse for the tyres. And thanks to John Watson for the great photos, be sure to check out his coverage of the MADE Australia Bike Show at The Radavist.
Many thanks to Alex from Off Course Bike Shop for this write up! It paired perfectly with John’s photos!
We’d like to thank all of you who submitted Readers Rides builds to be shared here at The Radavist. The response has been incredible and we have so many to share over the next few months. Feel free to submit your bike, listing details, components, and other information. You can also include a portrait of yourself with your bike and your Instagram account! Please, shoot landscape-orientation photos, not portrait. Thanks!