


Carrying stuff on bikes can be complicated – especially when you’re a notorious over-packer who likes to have a DSLR on hand. The Wolverine is my first ground-up drop bar build in a while, and I wanted to ensure that both transporting and accessing my camera would be well thought out.
Since we got married last October, Stephanie and I have been putting the pieces together to take off on a multi-month trip beginning in July. Wanting to produce galleries and stories on the road means having a bike-camping friendly way to carry my camera gear. I decided on a Swift Ozette rando bag – and the Hinterland Collection made with X-Pac VX21 had classic rando utility with a technical, modern twist.

I got talking with Martina at Swift over email, and ended up heading down to Seattle to visit their studio and pick up my bag in person. While Martina does get out on a lot of adventures herself, she also loves to live vicariously through others. Finding out that Stephanie and I were headed in the direction of the Great Divide route and planning on sticking to dirt as much as possible, she recommended finding a robust decaleur solution for my Ozette.
With a few months before Stephanie and I were to depart on our big trip, I didn’t want to rush the decision. I had heard enough about cheap decaleur failures and didn’t want to end up with a busted bag holder in the middle of nowhere. I considered the Berthoud decaleur, but I felt the retro-rando look didn’t really jive with my build.
Of course, with our bikes rideable, I couldn’t help but use the Ozette without a decaleur. I picked up a camera insert that Ortlieb makes for their handlebar bags, and immediately I fell in love with the utility of the Ozette. At first I was concerned that my Gevenalle shift cables might get in the way; while they do make it more challenging to get into the bag while pedaling, I rarely find myself wanting to do that anyway.

I found my inspiration when I saw Robert from Ocean Air Cycles’ home-hacked decaleur setup. The readily-available Ortlieb pannier rail was a system that I trusted (and would already be using on the trip), and it being quick release was a bonus. The Nitto lamp holders that Rob used were an excellent off the shelf solution, so all that was left was the bar for the pannier rail to hang on. While his initial design used a drilled out handlebar for the pannier rail to attach to, the updated version used a kitchen cabinet handle from Home Depot.
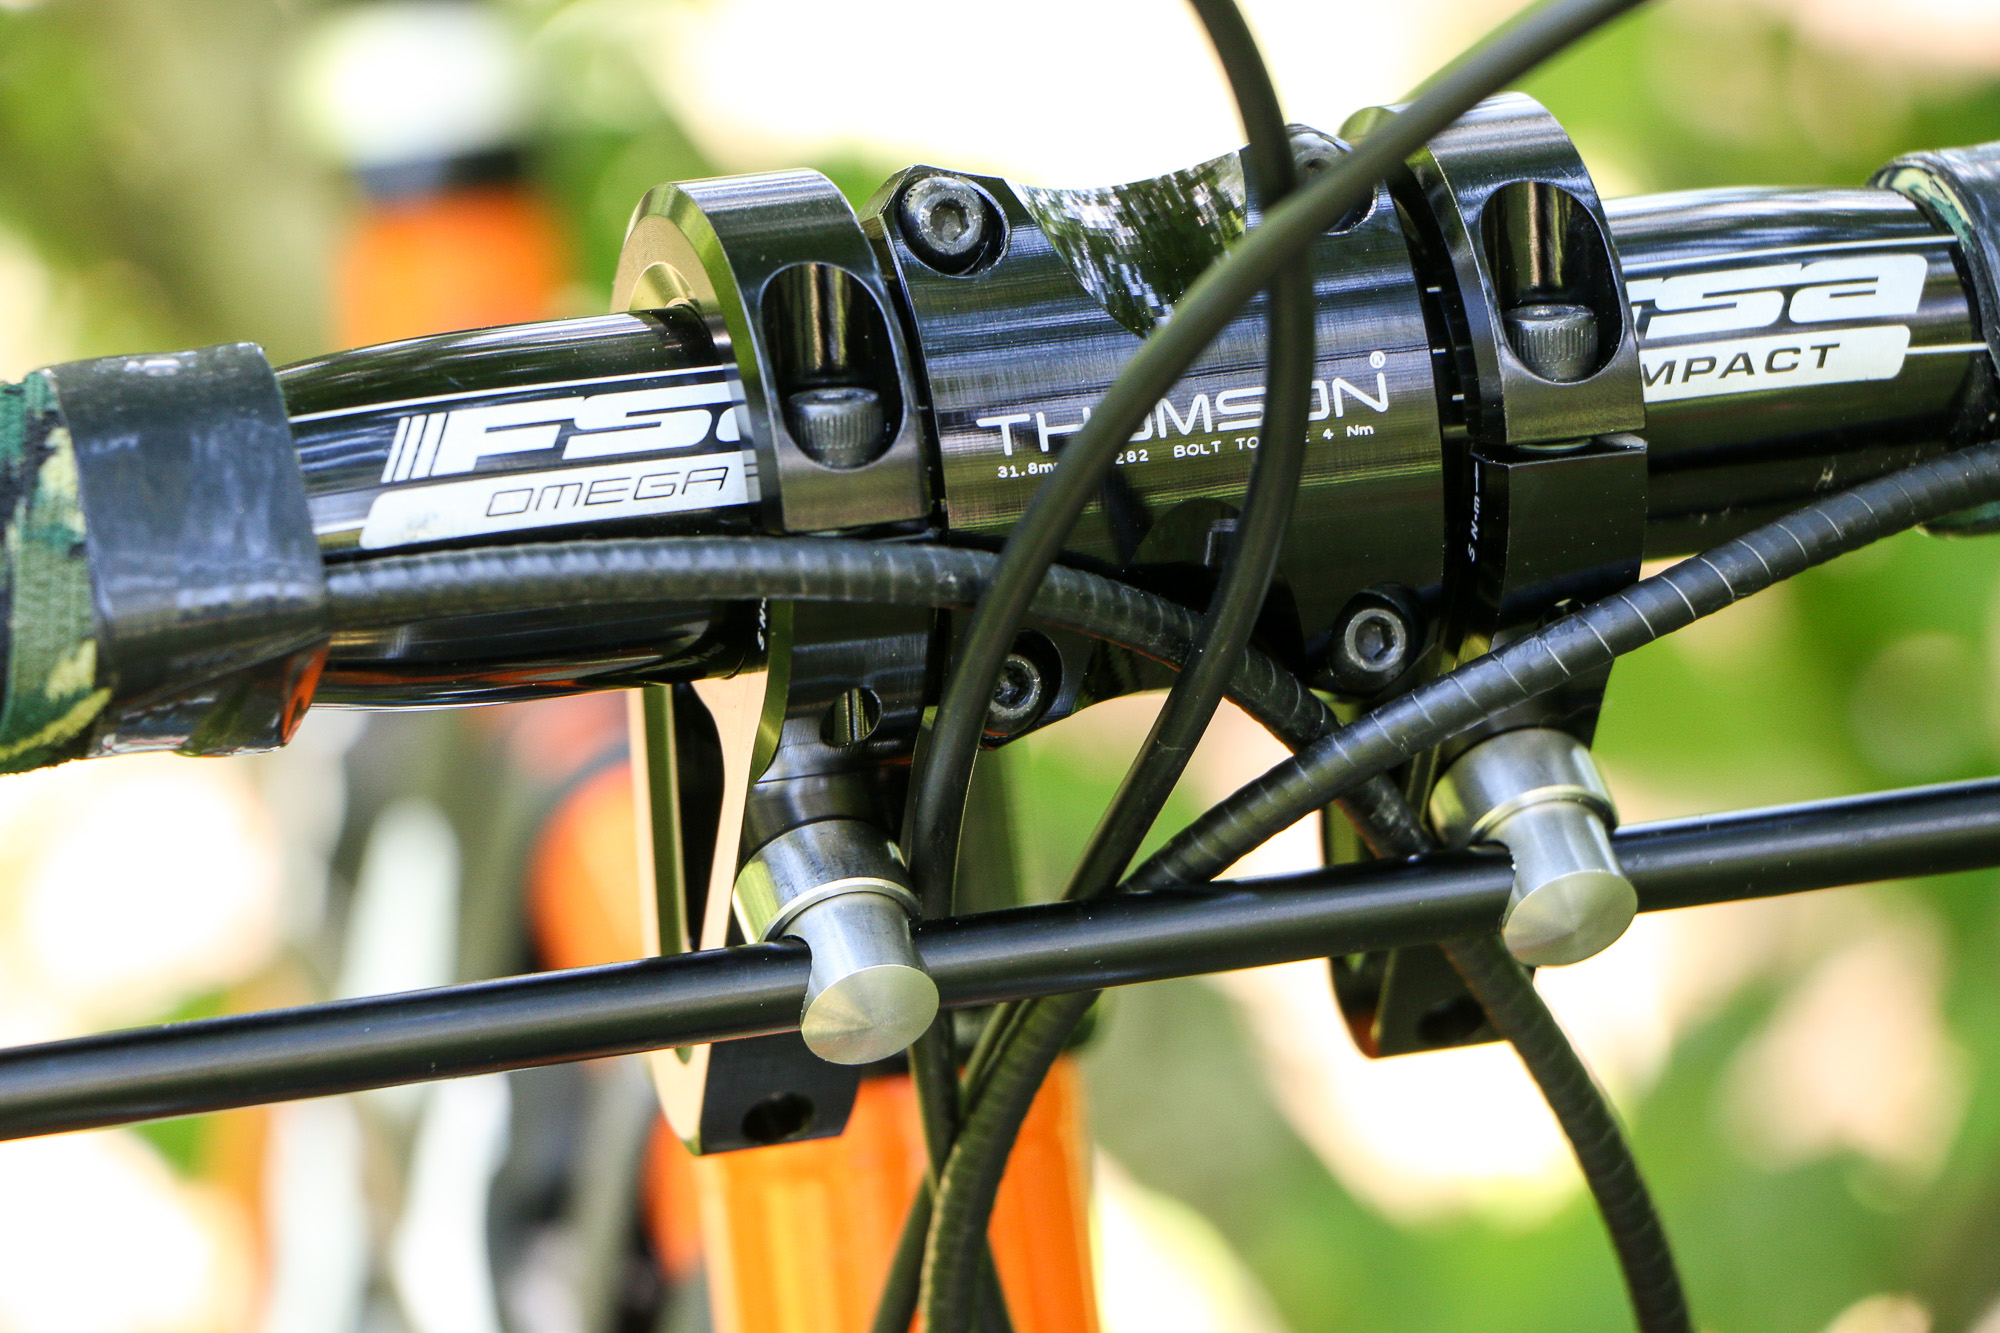
Shortly after I began scheming, the light bulb clicked on: a two-piece direct mount downhill stem would give me the modern look the lamp holders did not, while providing a flat surface on which to mount a piece of bar stock. I looked at a lot of options out there in the DH world, many of which either had a single bolt clamp for the bar or a shape that wouldn’t work with my idea. I stumbled across the Thomson Direct Mount stem, at that point not even knowing they made a DH stem, and the rest fell into place. I did some measurements and ordered up the parts.

Once I had all the parts amassed, it only took about an hour to put it all together – including the most stressful part: burning the holes in the Ozette to mount the Ortlieb rail. I first put the DH stem on my handlebar, attached the Tubus stay, and then hung the Ortlieb rail on it to see where to best mount the rail on the Ozette.
Because I’m using a medium Ozette, I ended up having to mount the rail as low as it would go on the bag and in the top holes of the DH stem. If you have a small bag, you will be even more limited in placement options, but if you have a larger bag, you have a bit more leeway.
I was concerned that I may have to redo my cable routing, or worse, that it wouldn’t work out at all. I don’t have a lot of room between the front of my handlebar and the Ozette, but it turns out that this system actually creates more space as you can push the bag forward a bit with your rail placement. Using a different mini front rack, with adjustable stay lengths, would also make for more room between the bar and bag. Alternatively, you could run a bar with more forward reach and a shorter stem.

What I used to make this happen:
Swift Industries Hinterland Ozette Bag – Medium
Nitto Campee 32f mini front rack
Thomson Direct Mount stem 30º x 40mm
Ortlieb QL1 short top rail E107
Ortlieb QL1 top hooks E162
Ortlieb screw set E205
1 x Tubus Roundstay 240mm
2 x Tubus stay clampset
2 x random button head Torx screws

As with any home-hacked solution, I’m not saying this is the be-all, end-all for attaching rando bags to handlebars. But, I think it does a pretty good job of providing me with the versatility and dependability I was looking for, without resorting to custom machining or welding. There are potentially still some tweaks to be done, including chopping the end off the Tubus stay and finalizing cable lengths, but I’m really happy with how it turned out.
I’ve continued to talk with Rob from Ocean Air about the design, and we are throwing ideas around about getting the adjustable reach that would allow a system to be more universal. As I said this isn’t the only way to solve the problem of attaching a rando bag to your bike; I just want people to get stoked on figuring out what will work for their own needs, and to see that some off the shelf parts can help make it happen.
____
Follow Morgan on Instagram.
